Piezo Ignitor installation instructions
The ignitor kit comes pre-wired. No wiring is necessary.

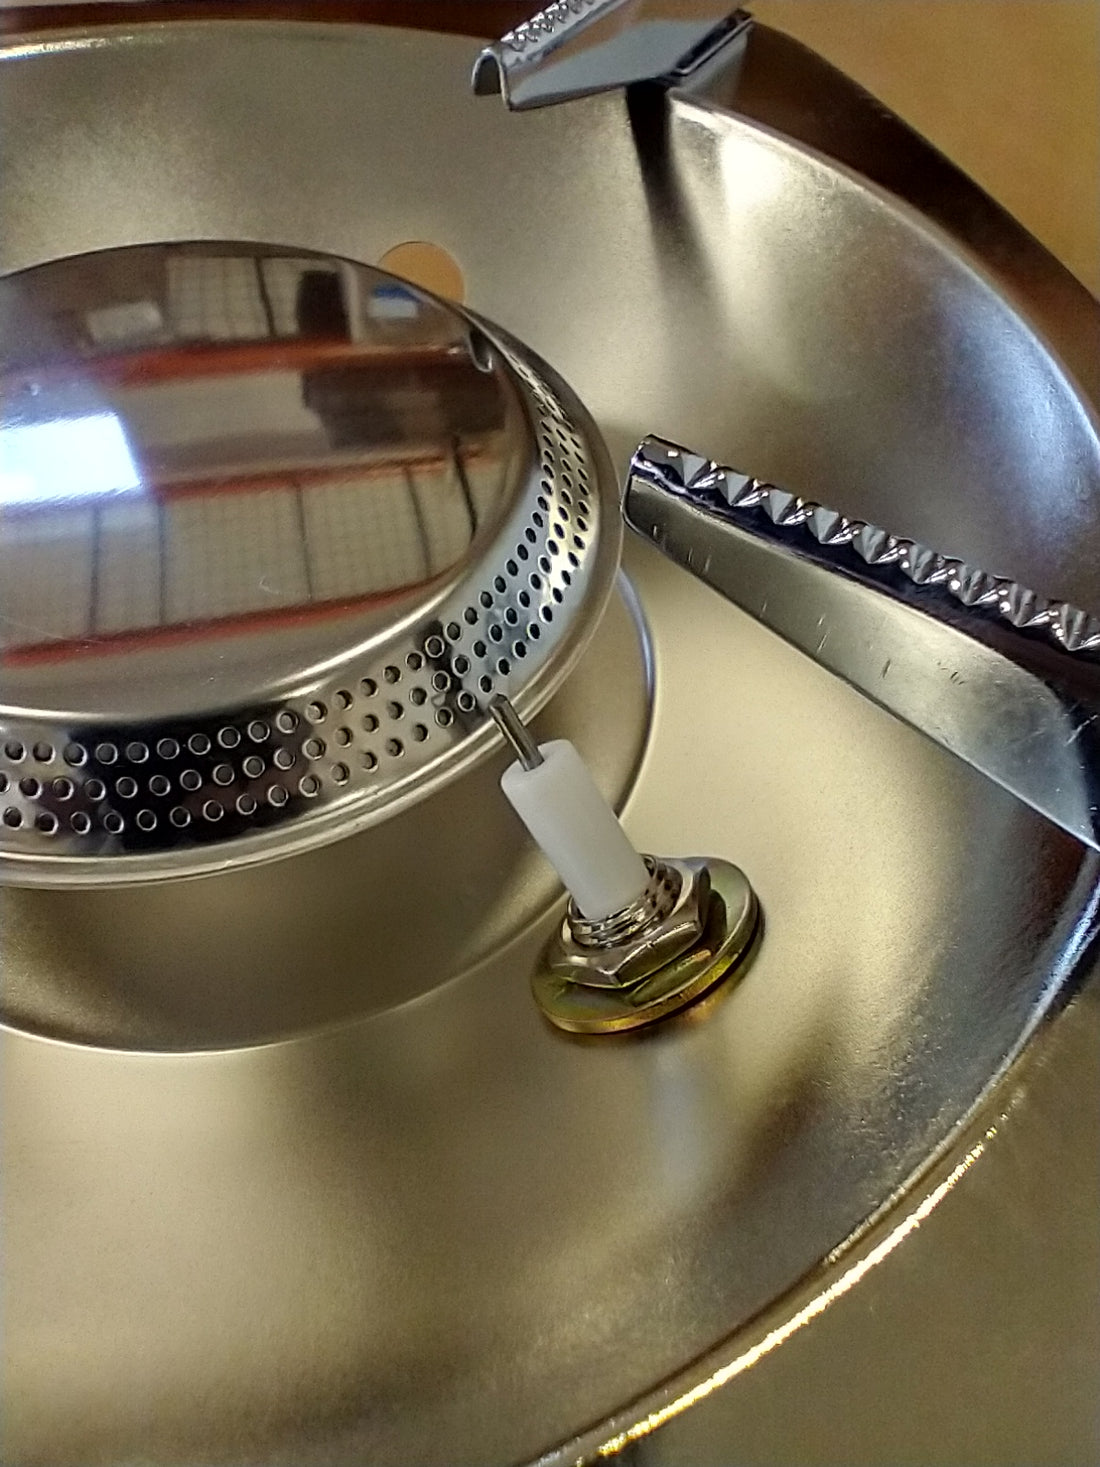
The electrode is installed in one of the pre-existing holes in the burner. It will fit in with no drilling or enlarging of the hole.
Take off the top nut and washer. Place the electrode through the hole in the burner. Replace the washer and nut so that you are sandwiching the metal burner case between the two washers.

Position the electrode to about 1/4” away from the burner.
Tighten the nuts with a 9/16” or 14mm wrench. Just snug up the nuts, do not over tighten, they are not grade 8 suspensions bolts, just snug.
Install the switch in the mounting bracket.

Push the mounting bracket with the switch installed on the base of the Oris skottle. Place it wherever feels comfortable to your style of cooking. It will be a tight fit and you may need to bend the mounting bracket tab a little to get it to start.

Test the function by pressing the switch and looking for a spark. You will need it to be dark to see the spark going from the electrode to the burner. If no spark is visible reposition the electrode.
Turn on the burner and enjoy a push button start.
Thank you
Ryan